 |
More samples
Do Impossible Things. |
|
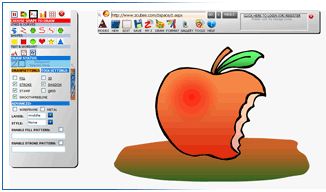
Cut an apple in ZSpace
Time
taken: 2 Minutes.
Tools Used:
ZPaint.
1. Uses Preset Scheme (Apple) - Red to Black Gradient. Use
Curve Shape to draw the apple (without 3D).
2. Uses Preset Scheme (Gold). Use Curve Shape to draw the
cut in the apple. (without 3D)
3. Uses Preset Scheme (Forest). Use Curve Shape to draw
the leaves of the apple. (without 3D)
|
|
|
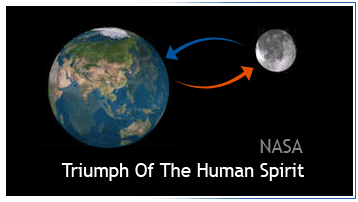
Go to the moon and back
Time taken: 4 Minutes.
Tools Used:
ZPaint, Drag-Drop ZCubes Formatting.
1. Drag and Drop
pictures (Courtesy: NASA) from Google Image Search (with "earth
:nasa" search and "moon :nasa"). Make ZCubes
transparent. Note that the earth has two pictures one over
the other. Make one of the ZCubes transparent so you can see
through.
2. Switch to whiteboard mode to draw arrows.
3. Create New ZCube. Use ZPaint
to type the text using preset schemes (Silver).
4. Drag-Drop Dark Olive Green Color from Named Colors Selection
Tool to the newly created ZCube.
5. Arrange all ZCubes the way you like.
|
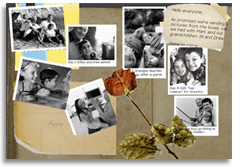
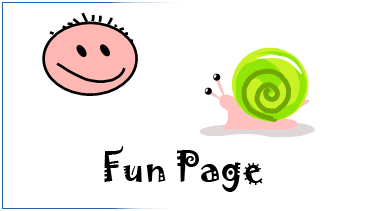
Just fun stuff- Work at the speed of light
You can create fun-pages, notices, advertisements, brochures,
for-sale papers, scrapbooks... both for work or for fun!
It takes minutes to get creative with ZCubes.
It is so versatile, that you can prepare practically all
your documents in ZCubes (and even store it in your disk
or jumpdrive for future use or viewing pleasure)!
Time taken: 2 Minutes.
Tools Used:
ZPaint, ZBrowser.
1. Change background to the appropriate image
2. Switch to paint mode, and select Red Pen Preset Scheme.
Add a black shadow from the Shadow Settings.
3. Just draw whatever you like.
|
|
|
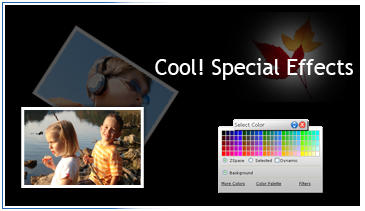
Drag-Drop Everything!
Drag-drop hyperlinks,
images, movies, and websites into ZSpace. Format and construct
the experiences with simple drag-drop (even from your favorite
search engines like Google). Create, store and publish
experiences that seamlessly integrate any kind of media
imaginable!
Manage all of your web content including pictures, documents,
videos, songs, news (RSS) feeds, PDF files, web links, web-pages
and even your own freehand drawings.
Time taken: 2 Minutes.
Tools Used:
Craete ZCube, Drag-Drop ZCubes Formatting, Special Effects,
ZPaint.
|
1. Create few
ZCubes, add text.
2. Drag and drop colors from the Colors box into the ZCubes.
3. Use ZPaint to write your text ("Cool Special Effects").
Use the red thin pen and blue thin pen from preset schemes.
4. Drag and drop earth's image from Google Image Search (Courtesy:
NASA).
5. Apply "Default Special Effect Setting (e.g., Halo)"
Effect from Special Effects option in Action Bar Menu.
6. Drag and Drop black color from Color Selection box to the
background to make the background black.
|
|
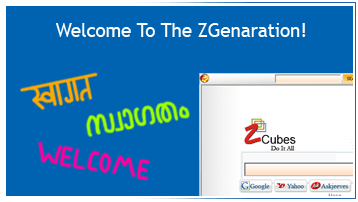
Work in any language!
With ZCubes, handwriting is a reality on
the web. You do not need Tablet PCs or writing tablets. Just
use your mouse, and click and drag. That is all to it.
No special fonts are required. Make signs and letters in ANY
language imaginable. In fact, use any language script from
the Milky Way Galaxy - and it will work!
Time taken: 2 Minutes.
Tools Used:
ZPaint, Drag-Drop ZCubes Formatting, Rotation of ZCubes.
1. Create a new ZCube, add text.
2. Drag and drop "Steelblue" color from the Colors
box into the ZCube. Color the text white by dragging and dropping
"White" color (from the link with a * to indicate
text formatting).
3. Use ZPaint to write your text ("Welcome") in
any language of your choice. Use the red pen from preset schemes.
|
 |
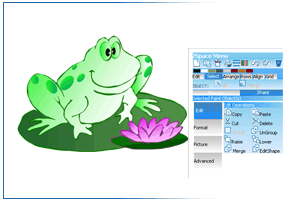 |
Curves, Shades, and More!
ZCubes offers advanced 2D
and 3D
graphics with highly sophisticated vector editing capabilities.
With simple straight lines to complex bezier curves, ZPaint
is the best platform for you to express your digital self.
Time taken: 1 Minute.
Tools Used:
ZPaint.
1. Start ZPaint, Select Start Fill Color (Blue) and End Fill
Color (Red).
2. Select curve tool and draw the points as you please.
3. Switch to edit mode. Select Polyline Edit Tool. Select
the drawing on screen. Right click on any point to adjust
the point or add/delete new points. Move them around until
you get the final desired setting. |
 |